
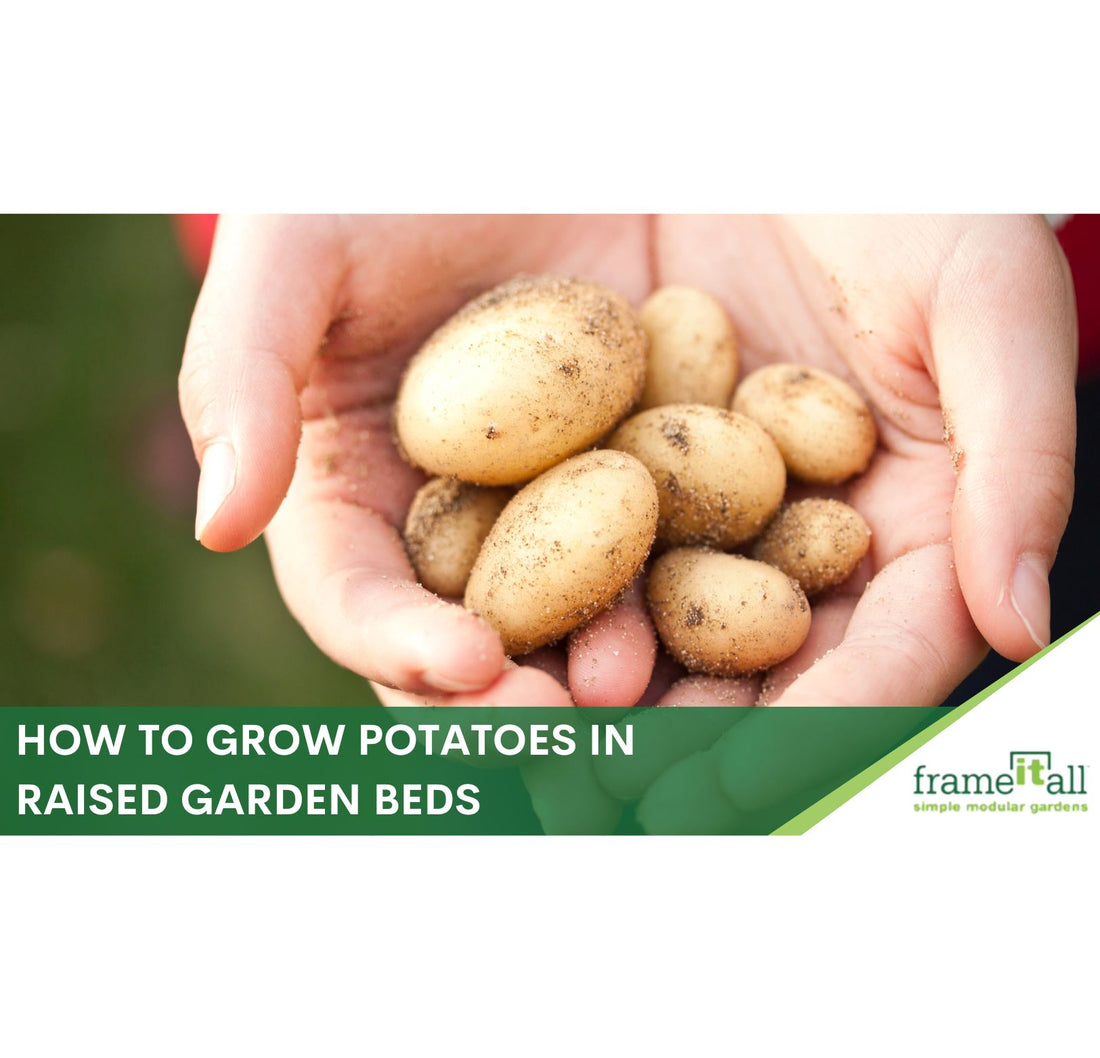
If you’ve ever tried to grow potatoes in the ground, you might be familiar with the challenges: compacted clay soil, poor drainage, and the back-breaking work of digging for your harvest. This is where growing potatoes in raised beds changes the game completely. A raised bed gives you total control over the soil, creating the loose, well-draining environment where potato tubers thrive. It simplifies planting, watering, and best of all, harvesting. This article is your complete guide to leaving those old gardening struggles behind and achieving a successful, heavy yield with a smarter, more efficient method.
Growing potatoes in raised beds is an excellent way to maximize the yield of your potato crop. With fresh, organic potatoes right at your fingertips, you can enjoy the staple of so many delicious meals, with the satisfaction that you grew it yourself. Raised beds have several benefits over traditional potato growing methods, including improved drainage and less soil compaction.
But without the proper knowledge and techniques, growing potatoes in a raised bed can be tricky. In this article, we’ll provide some helpful tips for getting started with raised bed potato cultivation. You'll be ready for harvest time in the blink of an eye!
Why Grow Potatoes in Raised Beds?

Raised bed gardening is a great way to maximize your garden space, and growing potatoes with this technique can be an easy and rewarding experience. Raised beds are one of the best ways to grow potatoes, as they thrive in loose, well-draining soil.
As such, growing potatoes in a regular or keyhole garden raised bed offers numerous benefits. For one, it’s easier to keep weeds at bay since the beds are elevated off the ground. Plus, you won’t have to worry about soil compaction or having to dig deep into the soil when harvesting. Additionally, the soil in raised beds tends to warm faster in springtime due to its direct exposure to the sun. This helps create ideal conditions for early potato planting.
Another benefit of growing potatoes in a raised garden is that they require less maintenance than traditional garden beds do. Because the soil is loose and well-draining, you don’t need to worry as much about over-watering or overwinter crop protection. All you need to do is water your plants regularly and add a layer of straw or grass clippings every couple weeks during summer months for weed control.
Raised bed gardening also makes it easier to complete the harvest of potatoes since the roots tend to be closer together and more compact than those found in traditional gardens. You can easily pull out any size potato with a simple tug of your hand! With so many advantages, it’s no wonder why so many gardeners opt for planting potatoes in raised beds – no matter their level of experience!
Choosing the Right Raised Bed Depth
Why Deeper is Better for Potatoes
When you’re planning your potato patch, the depth of your raised bed is one of the most important factors for a big harvest. While a 12-inch deep bed is a decent starting point, aiming for 18 inches or more will give your potatoes the best chance to thrive. The reason is simple: potatoes aren't roots; they are tubers that grow off the main stem underground. To encourage more tubers to form, gardeners use a technique called hilling, which involves mounding soil up around the plant's stem as it grows. A deeper bed provides ample vertical space for this process, allowing you to build up the soil and create more room for a bountiful crop to develop.
Beyond just providing more growing room, a deeper bed creates a superior environment for your potato plants. The increased soil volume warms up more quickly in the spring and holds that warmth longer into the fall, which can give you a valuable head start on the season. This stable temperature is ideal for tuber development. Furthermore, the loose, aerated soil in a deep raised bed ensures excellent drainage. This is critical for potatoes, as they are prone to rot in waterlogged conditions. Good drainage prevents disease and promotes a healthy, robust root system, setting the stage for a successful harvest.
Achieving the perfect depth for your potato bed doesn't have to be complicated. Using a modular system makes it easy to customize the height to fit your gardening goals. For example, Frame It All's composite raised garden beds use a snap-lock system that allows you to stack boards to your desired height, whether that's 11, 16.5, or 22 inches. This flexibility means you can create the ideal deep environment for your potatoes without any special tools or complex construction, ensuring you get the most out of your crop.
How to Plant Your Potatoes

Now that we've gone over the benefits of planting potatoes in raised beds, let's take a look at some tips to help you get started.
First and foremost, it’s important to choose a sunny area for your beds – preferably with 8-10 hours of direct sunlight each day per bed. This will ensure that your potatoes receive enough heat and light for optimal growth. Additionally, make sure to use high-quality soil that is well-draining and nutrient-rich. For an added boost, consider adding aged compost or fertilizer to the soil prior to planting.
When it comes to spacing, try to keep your rows about 18-24 inches apart so the plants have plenty of room to grow. As the potato plants reach maturity, cover them with additional soil or mulch for extra protection from pests and disease.
Last but not least, make sure to keep your potatoes well-watered all during the growing season. Keeping these basic points in mind will have you well on your way to cultivating a prosperous potato harvest.
Prepping Your Soil for Perfect Potatoes
Before you begin planting new potatoes in your beds, it’s important to ensure the soil is properly prepared for optimal growth. To do this, you’ll need to loosen the soil and check its pH levels. For best results, aim for a pH range of 6-7 – if your soil is too acidic or alkaline, consider adding lime or sulfur accordingly.
Once the pH levels are at an appropriate level, make sure to incorporate ample amounts of compost or aged manure into the soil. This will help provide the necessary nutrients that your potatoes need to thrive. Additionally, don't forget to add a layer of mulch on top – this will help keep weeds away and retain moisture in the soil during dry spells.
With that said, it's also important to note that potatoes prefer slightly acidic soils as opposed to neutral or alkaline soils. If your soil isn't quite acidic enough yet, you can easily adjust it by adding some peat moss or pine needles. With a few simple tweaks like these, you'll be able to create perfectly balanced conditions for your potato plants to thrive!
Which Potato Variety Should You Plant?
Now that the soil is prepped and ready to go, it's time to choose a type of potato to grow. Depending on the climate you live in and the amount of space you have available, there are several different varieties to choose from.
For colder climates, look for potatoes that are labeled as “early maturing” or “disease-resistant.” These will be able to withstand cooler temperatures and will also be less prone to disease and rot. For warmer areas, consider potatoes that are labeled as “late maturing” or “heat tolerant.”
When shopping for seed potatoes, check the packaging for any signs of damage or disease. You'll want to avoid any potatoes with discoloration, soft spots, or signs of mold – these could potentially spread disease to other plants in your garden. Additionally, pay attention to the size of the potatoes – smaller ones usually produce more consistent yields than larger ones.
Once you've chosen the right type of potato for your garden, it's time to start planting! Make sure to plant each seed piece at least 4-6 inches deep and around 12 inches apart – this will ensure they get enough room to properly develop their tubers. Additionally, remember that potatoes need plenty of water throughout their growing cycle so make sure they're well-watered whenever needed! We’ll get into more details about this later on.
Preparing Your Seed Potatoes
Once you have your seed potatoes, a little prep work can make a huge difference in your final harvest. Taking the time to prepare your potatoes before they go into the soil gives them a strong start and helps prevent disease. It might seem like an extra step, but it's well worth the effort for a healthier, more abundant crop. Let's walk through two simple but effective techniques that many gardeners swear by: chitting and curing. These methods will get your potatoes ready for their new home in your raised bed and set them up for success from day one.
Chitting: Giving Your Potatoes a Head Start
Chitting is a simple technique to encourage your seed potatoes to sprout before planting. Giving them this head start, typically for about four weeks, helps them grow faster once they're in the ground. To start, place your seed potatoes in a single layer in a cool, bright location, like a windowsill or a porch that doesn't get direct, intense sunlight. An old egg carton works perfectly for holding them upright. Make sure the end with the most "eyes" (small dimples where sprouts will form) is facing up. In a few weeks, you'll see short, sturdy, purplish-green sprouts appear, which is your sign that they're ready for the garden.
Cutting and Curing Seed Potatoes
If your seed potatoes are larger than a golf ball, you can cut them into smaller pieces to get more plants from your purchase. Use a clean knife to slice them, ensuring each piece is at least two inches square and has one or two eyes. The most important part of this process is curing. After cutting, let the pieces sit in a well-ventilated spot for a day or two before planting. This allows the cut surfaces to dry out and form a scab, which creates a protective barrier. Planting freshly cut potatoes without curing can invite rot and disease once they're in the damp soil, so don't skip this crucial step.
How to Plant Your Seed Potatoes
Once the soil is prepared and you’ve chosen your potato variety, it’s time to get planting! Planting potato tubers is a relatively simple process, but there are a few things to keep in mind.
For example, if you’re planting multiple varieties of potatoes in the same bed, like baby potatoes alongside other types like Yukon Gold ones, make sure they don’t touch each other or cross-pollinate. Cross-pollination can result in strange-looking potatoes and even lower yields, so it’s best to avoid it when possible.
Other than that, you’ll want to make sure that the potato tubers you plant are of a good quality. Generally, this means that they should be firm and have no signs of rot or decay. If your potatoes aren’t in ideal condition, it might be better to buy new ones to ensure a successful crop.
When planting the potatoes, make sure that you cover the tubers with a few inches of soil and mulch. This will help them grow more easily and protect them from pests that may try to feed on them. If you’re planting in rows or hills, make sure there’s adequate space between the plants so that they have enough room to spread out.
With these tips in mind, you should have no problem getting your potato crop off to a great start!
Placing Seed Potatoes in the Soil
Before your seed potatoes go into the ground, a little prep work goes a long way. If you have larger seed potatoes, you can cut them into smaller pieces, making sure each piece has at least one or two 'eyes' or sprouts. Let these cut pieces sit out in a dry, well-ventilated spot for a day or two. This process, called curing, helps form a protective callus over the cut surface, which is your best defense against rot once they're in the soil. When you're ready to plant, dig a trench or individual holes about 4 to 6 inches deep. Place each potato piece with the cut side down and the eyes pointing up toward the sky. Space them about 12 inches apart to give each plant plenty of room to develop its tubers. Finally, gently cover them with a few inches of soil and a light layer of mulch, like straw, to hold in moisture.
Keeping Your Potato Plants Happy

Once your potatoes are planted, it’s time to focus on ongoing maintenance. These beds require special care when it comes to keeping them healthy and productive. Here are some tips for ensuring your potato crop is a success:
- Watering: Potatoes need plenty of water, especially when they’re actively producing tubers. Water deeply at least once a week, or more often in hot weather or if the soil seems dry. Make sure you avoid over-watering, as this can lead to the development of fungal diseases that can harm your plants.
- Weeding: Weeds can compete with your potato plants for water and nutrients, so it’s important to keep them under control throughout the growing season. Pull weeds by hand and use mulch to help prevent them from taking root again. This will also help reduce moisture loss from the soil which can be beneficial during dry spells.
- Fertilizing: Potatoes require regular fertilization throughout their growth cycle in order to produce high yields of quality tubers. Around the plant's base, add an organic fertilizer like compost or dung tea every few weeks. With these nutrients, growth will be optimal and yields will be high.
If you follow these instructions, your potatoes will flourish in their new raised bed! Maintaining a healthy potato crop will ensure harvests throughout the growing season.
How Much Water Do Your Potatoes Need?

Potatoes need a lot of water to flourish and produce well. In order to make sure your plants are getting enough water, you should check the soil often. How much water should you give your potatoes? Here are some suggestions.
Start by watering deeply but less regularly. So, don't water again until the top few inches of soil are completely dry to the touch. It's important to water gently and uniformly so that all the roots can absorb the water. In order to prevent the spread of fungal diseases, you should avoid soaking the leaves.
The exact amount of time between waterings needed for potatoes is conditional on several elements, such as the soil type, the weather, and the growth stage of the potatoes. To start, here are some broad recommendations:
- Maintaining an optimal soil moisture level—one that isn't too dry or too wet—is crucial during the germination and early development stages. When the top inch of soil is dry to the touch, water the potatoes. In hot and arid climates, this is of paramount importance.
- You can cut back on how often you water as the plants begin to bloom, but the soil still needs to be kept continuously moist.
- As the potatoes reach maturity, you should gradually decrease the amount of water you give them. If you overwater the potatoes now, they may rot later.
- Growing potatoes in pots may require more frequent watering than planting them in the ground.
You should water your potatoes around once a week at a minimum, but this should be adjusted depending on the conditions in your particular growing location.
You may also want to think about implementing a drip irrigation system or soaker hose. They are more effective than using a garden hose to water plants by hand since the water is sent straight to the plant's roots. There is also increased precision in terms of when and how much water is applied with the help of these devices.
Finally, keep an eye on how much rain your area receives and adjust your watering schedule accordingly. Too much or too little water can cause problems with potato growth and yield, so monitoring rainfall can help you determine when and how much supplemental irrigation is necessary. With careful management of your potato's water needs, you will be rewarded with a healthy harvest from your terraced, curved or corner garden!
When to Fertilize and Mulch
Although we believe in organic gardening, sometimes Mother Nature needs a bit of extra help. If you’re having trouble growing your potatoes, you might want to consider adding a bit of fertilizer to your soil.
Having properly watered your potatoes, if your potatoes are not growing it is important to ensure that the soil is adequately fertilized and mulched. This will help ensure the roots are receiving enough nutrients for healthy growth and development.
Which fertilizer is ideal for potatoes depends on the soil conditions and the growth stage of the tubers. If you're looking for potential solutions, here are a few:
- Compost is an excellent all-around fertilizer because of the gradual release of nutrients it offers to the soil. Soil structure and water-holding capacity are both enhanced, which is very useful for potatoes.
- Well-rotted manure, if you can get your hands on it, may be a fantastic nutrient source for potatoes. It's crucial to only utilize aged manure, as fresh manure can burn plants and may contain diseases.
- Fertilizers high in nitrogen are essential for the early phases of a potato plant's growth, when the plant's leaves are still developing. Meals like blood meal, fish meal, and cottonseed meal are all viable choices.
- High-potassium fertilizers are essential for the continued development of tubers as potatoes mature. Wood ash, greensand, and kelp meal are some of the other options.
When applying fertilizers, be sure to do it in accordance with the dosing and frequency recommendations provided by the manufacturer. Over-fertilization can cause environmental issues and decrease agricultural output, therefore it's important to have your soil analyzed to figure out what nutrients it requires.
The Hilling Technique for a Bigger Harvest
As your potato plants grow, you’ll want to practice a technique called “hilling.” It’s a simple but crucial step that involves mounding more soil, compost, or mulch around the base of the plants as they get taller. When your potato vines reach about six to eight inches in height, gently add more soil around them, leaving just the top few inches of leafy growth exposed. This process protects the developing tubers from sunlight—sun exposure can turn them green and bitter. Hilling also encourages more potatoes to grow along the buried stems, leading to a much larger harvest. You’ll likely repeat this process a couple more times throughout the season as the plants continue to grow.
An Alternative: The No-Hill Method
If hilling sounds like too much work, don’t worry—there’s a more hands-off approach. The no-hill method is a fantastic, less labor-intensive alternative that works especially well in raised beds. Instead of mounding up soil, you simply add a thick layer of organic mulch, like straw or shredded leaves, around the base of your plants. Just like with soil, the goal is to keep the developing potatoes covered and protected from the sun. As the plants grow, you just add more mulch. This method is an easy way to use mulch to keep your potatoes healthy while also suppressing weeds and retaining soil moisture.
Checking and Adjusting Your Soil pH
Another key to successful potato growth is testing the pH level of the soil in your raised bed before planting. The optimal pH for potatoes is between 5.0 and 7.0, so it’s important to make sure your soil falls within this range. For best results, you should test the pH of your soil once a year prior to planting and adjust if needed using lime or sulfur.
If you find that the pH of your soil is too high, add some sulfur to bring it down to the desired range. If it’s too low, adding some lime will help raise it up. Make sure to incorporate these materials into the soil after testing and before you plant your potatoes.
Extra Tip: Add compost or manure every couple of years as this will help keep the soil nutrient-rich and help maintain an optimal pH level for growing potatoes. This simple step can go a long way towards helping ensure healthy potato plants and a bountiful harvest!
How to Keep Weeds and Pests Away
Now that we’ve discussed the importance of soil pH when it comes to growing potatoes, let’s turn our attention to controlling weeds and pests. Keeping your raised bed free of these potential problems can be challenging, but with a bit of effort, you can keep your potatoes healthy and thriving.
The first step is to eliminate any weeds or pests present in the bed before you even start planting. Hand-pulling weeds is often the most effective way to do this, but you may also want to consider using a weedkiller if your raised bed is particularly weed-infested. This might not be completely organic, but it’s down to your personal preference and what you’re looking for from the health of your potato plants.
No matter what kind of weed killer you use, make sure to read all directions carefully before applying any kind of chemical treatment to your soil.
Once your raised bed is weed-free, it's important to stay vigilant about checking for new pests or weeds regularly. Inspecting the top few inches of soil and removing any pests you notice can help prevent them from spreading and damaging your potato plants. You could even install a fenced raised garden bed to keep the pests away.
If necessary, you may also want to use some organic pest control methods such as introducing beneficial insects that prey on common garden pests or spraying with neem oil. Taking these steps will help ensure that your potatoes have a chance to reach their full potential!
The Importance of Crop Rotation
Crop rotation is a simple but powerful technique that can make a huge difference in the health of your garden. The basic idea is to avoid planting the same type of crop in the same raised bed year after year. Potatoes, in particular, are susceptible to soil-borne diseases and pests that can build up over time. By moving your potato patch to a different bed each season, you can effectively disrupt the life cycles of these pests and diseases, preventing them from taking hold and ruining your harvest. This practice also helps manage soil nutrients. Potatoes are heavy feeders, meaning they use a lot of resources from the soil. Following your potato crop with a restorative plant, like nitrogen-fixing legumes (think beans or peas), helps replenish the soil naturally, setting you up for success with whatever you plant next.
When and How to Harvest Your Potatoes
When it comes time to harvest your potatoes, there are a few important things to keep in mind. First, the timing of your harvest is critical. Potatoes should be harvested when they reach their full size and before any frost hits the area. If you wait too long, the potatoes may become too large or suffer damage from the cold temperature.
Second, take care not to damage the potato plants as you're harvesting them. Gently loosen the soil around each plant and use a garden fork or trowel to remove them from the ground. Take care to avoid cutting or puncturing any potatoes in the process.
Finally, store your freshly harvested potatoes in a cool and dry place until you’re ready to enjoy them! With these tips in mind, you’ll be able to enjoy a bumper crop of delicious potatoes straight from your raised bed garden!
Planting and Harvest Timelines
Timing is everything when it comes to growing potatoes. You’ll want to plant them during the cool season, which is typically about 30 days before the last expected frost in your area. For many gardeners, this sweet spot falls in April. A great way to pinpoint your ideal planting window is to check your local frost dates online. This simple step ensures your seed potatoes get a strong start without being zapped by a late freeze. Once your potatoes are in the ground, you can generally expect them to be ready for harvest in about 90 days. So, if you plant in April, you’ll be digging up delicious, homegrown potatoes around July, just in time for summer barbecues and potato salads.
Signs Your Potatoes Are Ready to Harvest
Knowing when to harvest is just as important as knowing when to plant. The most reliable sign that your potatoes are ready is the state of the plant's foliage. You’ll need to wait until the leaves and stems above ground start to turn yellow and brown and begin to die back. While it might look like your plant is failing, this is actually a great sign! It means the plant has stopped putting energy into growing leaves and is now sending all its resources underground to mature the tubers. This is the final growth spurt that makes your potatoes ready for digging. Resisting the urge to harvest too early will reward you with larger, more flavorful potatoes with thicker skins, which helps them store longer.
What Do Potato Flowers Mean?
At some point during the growing season, you might notice your potato plants producing delicate purple or white flowers. Don't worry—this is a fantastic sign! These flowers are a clear indicator that the plant is healthy and has officially started forming tubers beneath the soil. Think of it as the plant's way of telling you that the magic is happening underground. However, it's crucial to remember that flowers are a midway checkpoint, not the finish line. The potatoes are still small at this stage and need several more weeks to bulk up. So, when you see those blossoms, simply admire them and know that your harvest is on its way, but keep your garden fork out of the soil for a while longer.
What to Expect from Your Harvest
One of the most exciting parts of gardening is anticipating the final yield. With potatoes, the results can be incredibly rewarding! While the exact amount will vary based on the potato variety and growing conditions, you can set some general expectations. A good rule of thumb is to expect about 1 to 2 pounds of potatoes for every single seed potato you planted. If you're growing a specific type like fingerlings, you might pull up around 15 potatoes per plant. For a standard raised garden bed, this could translate to a total harvest of 10 to 20 pounds of fresh potatoes. Imagine all the delicious meals you can make with that bounty, all from your own backyard!
How to Store Potatoes So They Last
It's time to put those potatoes away now that you've picked them. By following these steps properly when the potatoes are ready, you may keep their flavor and nutritional value intact for months. You will maximize the potential of your newly harvested potatoes by following these suggestions.
- Make sure your potatoes are completely dry to avoid the growth of mold. Use a paper towel or newspaper if necessary.
- Store them in a cool, dark place - between 45 and 50 degrees Fahrenheit (7 and 10 degrees Celsius) is ideal
- Keep an eye on your potatoes to make sure they aren't going bad. Throw them out if they have any sprouts or mushy areas
Curing Potatoes for Long-Term Storage
After all your hard work, you want your potatoes to last as long as possible. That's where curing comes in—it's a simple but essential step for long-term storage. Once you've harvested your potatoes, gently brush off any large clumps of dirt and let them sit on top of the soil to dry for a few hours. Then, move them to a dark, dry, and well-ventilated spot, like a garage or a shed. Spread them out in a single layer on newspaper or a screen so that air can circulate around each one. Let them sit like this for about one to two weeks. This process toughens up their skins and allows any small cuts or bruises from harvesting to heal over, which is key to preventing rot and ensuring they stay fresh for months to come.
What Should You Plant with Potatoes?
The use of raised beds for potato cultivation is a space-efficient and productive approach to increase yield per square foot of garden. If you want to maximize your crop, grow vegetables that go well together. It's a style of gardening in which two or more plants are planted together in hopes that they'll provide mutual benefits.
There are a number of effective companion planting combinations that can be used with potatoes. Tomatoes and potatoes, for instance, make a great match because they share a lot of nutritional requirements and promote each other's development. If you want to keep pests like aphids and potato beetles at bay while still reaping the benefits of having potatoes around, planting beans, carrots, onions, and garlic nearby is a wonderful idea.
Herbs such as chives, rosemary, sage, thyme and oregano can also be planted alongside potatoes as these will help keep away pests naturally while adding flavor to your dishes. Planting flowers like marigolds or nasturtiums near potatoes is another great option as these colorful blooms will bring in pollinators while also helping to protect against potato blight. With careful planning and the right combination of companion plants, you can create a thriving raised bed full of delicious homegrown spuds!
Common Problems When Growing Potatoes in Raised Beds
Although companion planting can be a great way to get the most out of your raised bed potatoes, it’s important to be aware of potential problems associated with growing them in this way. One of the main issues is that potatoes tend to require a lot of water, which is hard to provide consistently in this type of environment due to their shallow depth. This can easily lead to uneven growth or even soil compaction if too much water is added at once.
Learn More: How Deep Should Raised Garden Beds Be?
Another issue when it comes to growing potatoes in raised beds is that they are particularly susceptible to certain pests and diseases. Potato blight, for example, loves warm and humid conditions, so it's important to watch out for any signs of yellowing or wilting leaves. If you notice these symptoms quickly enough, you can take preventative measures such as removing infected plants or spraying with an appropriate fungicide.
Finally, it’s also important to keep an eye on the overall soil health when growing potatoes in raised beds. As these beds are usually quite small, nutrients can quickly become depleted if there isn’t enough organic matter being added back into the soil regularly. Adding compost or other nutrient-rich materials will help make sure your potatoes have everything they need for healthy growth and a generous harvest.
With that being said, raised garden beds can be a great way to grow potatoes. With a little extra effort in terms of maintenance, you can be rewarded with a bountiful crop of delicious spuds!
Find Your Perfect Raised Bed at Frame It All

Growing potatoes in raised beds has its own set of challenges and rewards. By preparing the soil properly, choosing the right type of potatoes, and utilizing companion planting, you can maximize your chances of success. With the right knowledge, you can grow healthy, delicious potatoes that will last for years to come.
And if you need to buy the perfect raised bed to plant seed potatoes, here at Frame It All, we offer a variety of raised bed systems that make it easy to create the perfect frame for your potato garden. Take a look at some of our raised garden beds and find the best place to plant your seed potatoes.Key Takeaways
- Go Deep for a Better Harvest: A raised bed that's at least 18 inches deep is your secret weapon for growing potatoes. This depth provides ample room for hilling and creates the loose, well-draining soil that tubers need to flourish, leading to a much more impressive yield.
- Prep Your Seed Potatoes Before Planting: A little effort before your potatoes go in the ground makes a huge difference. Simple techniques like chitting (pre-sprouting them in a bright spot) and curing (letting cut pieces dry and scab over) are essential for preventing rot and ensuring a strong start.
- Hill Your Plants and Wait for the Signs: As your plants grow, mound soil or mulch around the stems to protect the developing tubers and encourage more to form. Resist the urge to dig them up early; wait until the plant's foliage turns yellow and dies back, which is the key signal that your potatoes are fully mature and ready for harvest.