

A successful first growing season depends more on a smart setup than on having a green thumb. Raised bed gardening for beginners gives you control over sunlight, water, soil, and access from day one.
Explore Frame It All raised garden beds and start with a modular kit built to grow with you.
What should beginners know before starting a raised bed?
Start with a level site that receives six to eight hours of sun and sits near water. Choose a bed no wider than four feet, fill it with a loose topsoil and compost blend, and plant a few reliable crops. Check moisture regularly, then add trellises or pest barriers before plants need them.
This first-season checklist focuses on the decisions that prevent the most common beginner setbacks. Frame It All modular beds provide a low-friction option because the Snap-Lock system supports tool-free assembly, while stackable and extendable sections let you adjust depth or expand later.
Find the right spot
Success starts with where you put your garden. Most plants that grow food need at least 6 to 8 hours of direct sun each day. You should also pick a flat area that is near a water source. It is much easier to water your plants when the hose can reach them. Raised bed gardening for beginners works best when you plan for light and water before you build.
Pick a modular garden bed
For your first year, a modular bed is often the best choice. These beds let you start small and add more parts later as you get more skill. Frame It All beds use a patented Snap-Lock system. This system lets you put the bed together without any tools. It makes the job fast and easy for any DIY homeowner. You can find many ways to choose the perfect raised garden bed that fits your yard and your budget.
Your first-season checklist
Follow these steps to get your new garden ready for planting:
- Pick a sunny spot with 6 to 8 hours of light and easy access to water.
- Buy a modular bed with a tool-free setup to save time and effort.
- Put the bed together on a flat surface using a simple mallet.
- Fill the bed with a good mix of topsoil and organic compost.
- Select plants that fit the sunlight levels in your chosen garden spot.
- Check the soil moisture daily and water when it feels dry two inches down.
Gather your garden essentials
You do not need many tools to start, but a few key items are helpful. A good trowel, a watering can or hose, and quality soil are the most important. Using a raised bed helps you avoid compacted soils often found in new housing areas. This gives your plant roots plenty of room to grow deep and strong from day one.
How do you choose the right placement, size, and depth?
Place your bed on level ground near water where crops receive six to eight hours of direct sun. Keep the bed about four feet wide when it is accessible from both sides, leave two to three feet for paths, and choose a depth that supports both plant roots and comfortable gardening.
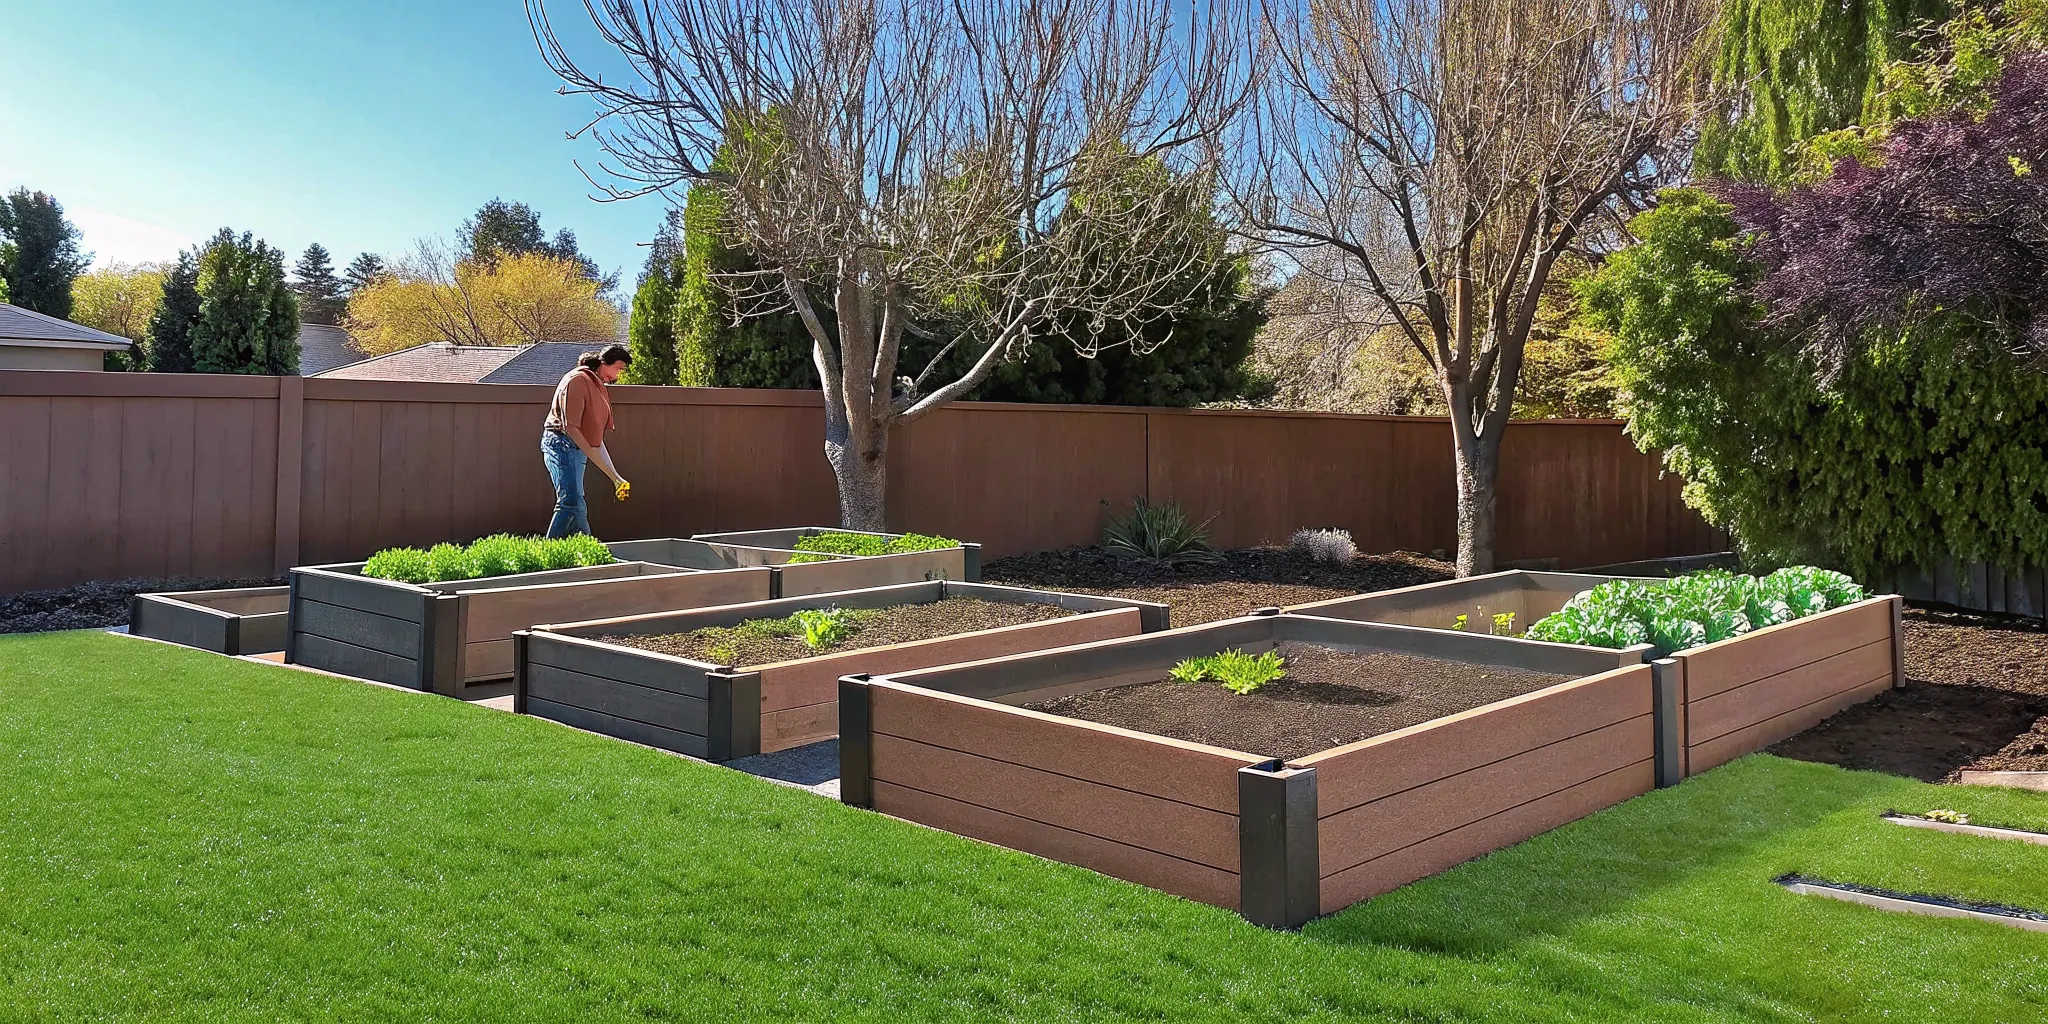
Picking the right spot is the most vital step in raised bed gardening for beginners. A good spot helps your plants grow strong and makes daily care much easier. Before you set up your new garden, look at how the sun and water move through your yard. Choosing the right place now will save you time and work later in the season.
Find a sunny spot near water
Most garden crops need a lot of light to grow big. For plants like tomatoes and peppers, you must pick a sunny spot. Aim for at least 6 to 8 hours of direct light per day. If your yard is mostly shady, you can still grow crops like lettuce or kale. You should also check that your garden is near a water source. It is much easier to grow food when you do not have to pull a heavy hose a long way. Make sure the ground is level so the water can soak in evenly. If the ground is not flat, water may pool in one corner and leave other plants dry.
Plan your bed size and layout
When you plan your raised bed layout, think about how you will reach your plants. A bed should be about four feet wide if you can reach it from both sides. This width lets you reach the center by hand without stepping on the dirt. You must never walk in your beds because your weight will pack the soil down too tight. Roots grow best when the soil is loose and full of air. You should also leave about two to three feet for paths between your beds. This gap gives you enough room to walk or use a small cart while you work. Using wood chips or mulch on these paths can help stop weeds from growing in the gaps.
Pick a depth that works for you
Depth matters for both your plants and your body. Most new growers start with beds that are about six to twelve inches deep. This size provides plenty of space for roots to spread in rich soil. If you have back pain, you might want a taller bed. Taller beds bring the garden to a higher level, which makes choosing the perfect garden bed better for your posture. You can also use a simple tool-free system that lets you stack layers to add depth over time. Just keep in mind that tall beds dry out faster than short ones. You will need to check the soil more often during hot weeks to keep your plants strong. Check the dirt two inches deep to see if it feels dry before you water.
How should beginners fill a raised garden bed?
Fill a beginner raised bed with a loose blend of roughly 50 to 60 percent topsoil and 40 to 50 percent compost. Calculate the bed volume before ordering soil, avoid relying on compacted yard soil, and refresh the surface with about two inches of compost before each new growing season.
Filling your new garden bed with the right mix is the key to a healthy harvest. Since raised beds act like large containers, they need soil that stays light and drains well. The goal is to create a rich spot where roots can spread easily without hitting hard, packed ground.
Choose a good soil blend
Most beginners find success using a mix of topsoil and organic matter. A common rule is to use about 60% topsoil and 40% compost. This mix gives your plants enough structure while giving them the food they need to grow. You can also follow a specific square foot gardening method to manage small spaces with more care.
Avoid using only garden soil from your yard. Yard soil often has too much clay or sand. This can lead to drainage issues in a raised bed. Instead, look for bagged mixes or bulk soil made for raised beds. These blends often include perlite or peat moss to keep the soil fluffy and light.
| Component | Purpose | Ideal Amount |
|---|---|---|
| Topsoil | Provides structure | 50-60% |
| Compost | Adds nutrients | 40-50% |
| Peat Moss | Retains moisture | 10-20% |
| Perlite | Improves drainage | 5-10% |
Find your fill volume
Before you buy soil, you must know how much you need. To find the size, multiply the length by the width and the height of your bed. This will give you the cubic feet of soil you need to buy. Knowing your soil and plant selection for raised beds early helps you avoid making extra trips to the store.
If you have a very deep bed, you do not have to fill the whole thing with costly soil. You can put organic items like logs, sticks, or leaves at the bottom. This is called the hugelkultur method. Over time, these items will break down and turn into rich food for your plants. This saves you money on your first fill.
Add compost to refresh soil
Plants use up the food in the soil as they grow. To keep your garden productive, you should add a fresh layer of compost every year. Compost and fertilizer are used more efficiently in these beds because they go only on the growing area. This helps your vegetables thrive season after season.
Check your soil levels each spring. Soil naturally settles and breaks down over time, so you may need to top off your beds. A simple two-inch layer of fresh compost is usually enough to wake up the bed for the new year. This simple step ensures your plants have a great start as the weather warms up.
Choose a modular raised garden bed that fits your first-season plan.
Which crops give beginners a rewarding first harvest?
Begin with dependable crops that match your light and season. Lettuce, spinach, radishes, bush beans, and peas offer approachable first harvests. In full sun, try tomatoes or peppers from transplants. Follow packet spacing so every plant has enough light, airflow, and root room.
Your first season in a raised bed should be fun and low on stress. To get a big win, you should pick plants that grow well in your local climate. Good planning helps you avoid common mistakes like planting too many seeds or poor timing. By picking hardy crops, you can build your skills and enjoy fresh food sooner.
Pick hardy plants for early wins
For most people, leafy greens and root crops are the best start. These plants do not need much work and often resist pests well. If your yard has some shade, you can still grow crops like lettuce, kale, and radishes. These hardy greens only need a few hours of sun to thrive in raised bed gardens where soil stays cool.
- Lettuce and spinach for quick salads
- Radishes for a fast harvest in weeks
- Bush beans that do not need a trellis
- Peas for cool spring or fall weather
If your bed gets full sun, you can try heat-loving plants. Crops like tomatoes, peppers, and eggplants need at least 6 to 8 hours of direct light each day. Since soil and plant choice for raised beds go hand in hand, make sure your soil has enough food for these heavy feeders.
Start with seeds or transplants
You must decide whether to use seeds or young plants from a shop. Seeds are cheap and offer more types of crops to grow. Some plants like carrots or beans must be sown directly into the bed soil. But for slow-growing crops like tomatoes, buying a plant is often easier for a beginner. This gives you a head start and makes the first harvest feel closer.
Use spacing to grow more food
Raised beds let you grow more food in less space. Since you never walk on the soil, it stays light and airy. You can plant your crops closer together than you would in the ground. When you grow plants close together, they shade the soil and keep the roots cooler by slowing down water loss. This is a key part of the square foot gardening method used by many experts.
Check the seed packet for the right spacing. Do not pack them too tight, or they may fight for light and air. A good bed should be thin enough to reach the middle from either side. This keeps you from stepping in the bed, which keeps the soil from getting hard. Modular beds with a Snap-Lock system make it easy to change your layout as you learn what works best for your yard.
How often should you water a raised bed?
Check raised-bed soil daily during hot weather by feeling about two inches below the surface. Water deeply when it feels dry at that depth. Morning watering, mulch, and drip irrigation reduce evaporation and help keep moisture steady without leaving foliage wet overnight.
Raised beds act like large pots in your yard. The soil in these beds stays loose and drains well, but it also dries out faster than the ground. In raised bed gardening for beginners, learning when your garden is thirsty is key. When your soil gets too dry, your plants can suffer. They may grow small, bitter fruit or stop growing and just produce seeds. This is because plants need water to carry food from the soil into their roots.
Checking soil moisture levels
You do not need a fancy tool to see if your garden needs water. A simple way to check is to use your finger. This test helps you avoid watering when the top looks dry but the roots still have water. Follow these steps:
- Push your finger two inches into the dirt.
- Feel for any dampness at that depth.
- If the soil feels dry, it is time to water.
Checking the soil each day is a good habit, mainly during the hot summer months. The height of your garden bed also matters. Taller beds tend to dry out more quickly than lower ones. Deep beds may need more water to stay wet. You should also think about soil and plant selection for raised beds when you plan your garden. Soil with organic matter stays wet longer.
Using mulch to retain water
Mulch is a layer of things like straw or wood chips that you spread on top of the soil. It acts like a lid for your garden, keeping the water from drying up. When you use mulch, you often do not have to water as much. It also keeps the soil and roots cool on hot days. Another trick to save water is to plant your crops close together. As the plants grow, their leaves shade the dirt below. This shade keeps the sun from drying the soil.
When you do water, try to do it early in the morning. This gives the leaves time to dry before the sun gets too hot. Watering at the base of the plant is also best. This gets the moisture right to the roots where it is needed most. Avoid getting too much water on the leaves, as this can lead to plant sickness. Steady watering helps your crops stay sweet and tender rather than tough or woody. You can find more tips on how to water your garden at the University of Minnesota Extension website.
Drip and soaker hose systems
If you have many beds or a busy life, you might try a drip system. Drip lines or soaker hoses sit on the soil and let out a slow, steady stream of water. This way gets water deep into the ground without wasting a drop. It also saves you from standing outside with a hose for a long time each day. Many beginners find that a timer makes their garden even easier to run. You can set it to water your beds at the same time every morning.
No matter how you water, keep an eye on your plants for signs of stress. Wilting leaves or slow growth are often the first clues that your garden is thirsty. By staying steady, you can ensure your plants have the water they need to grow well all season long. Good watering is just one part of the square foot gardening method or any other way you choose to grow your food.
How can beginners add trellises and prevent pests?
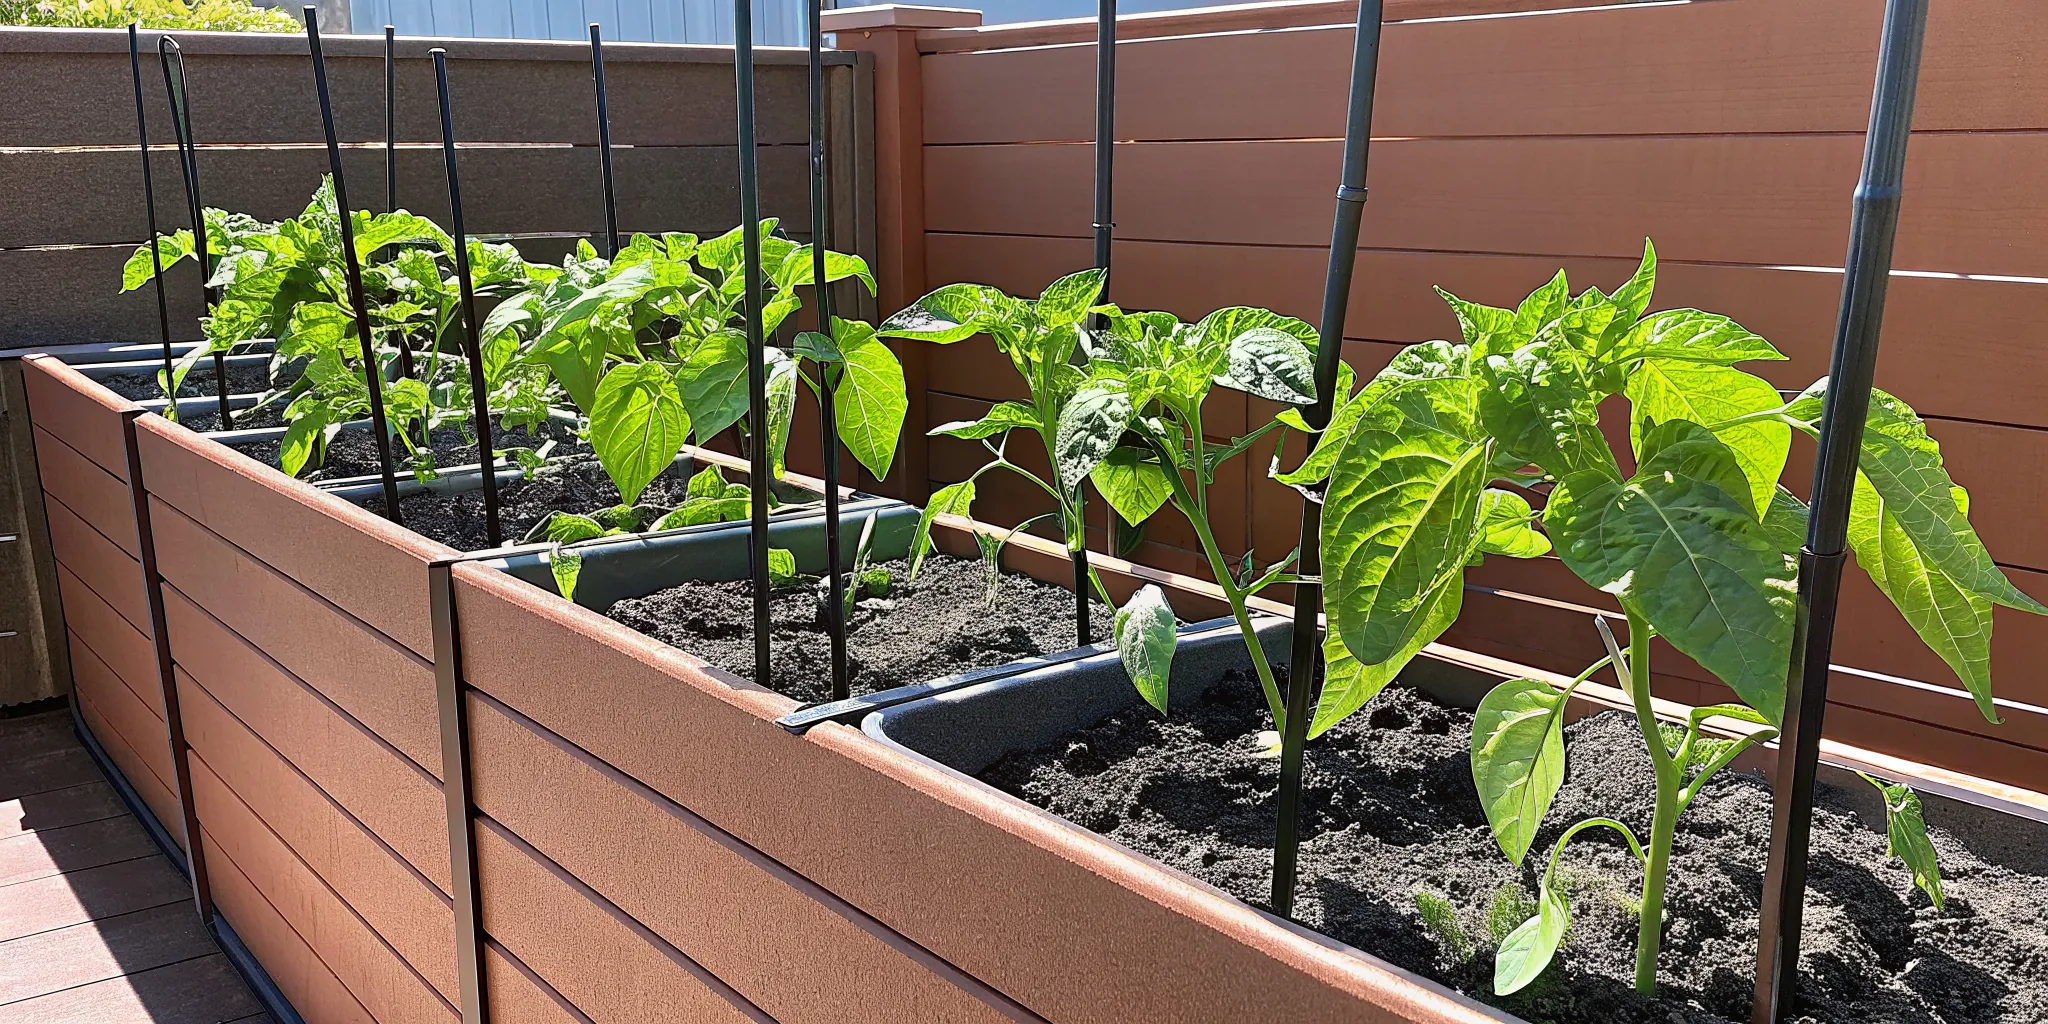
Install trellises and barriers before crops outgrow their space. Put tall supports on the north side to limit shade, train vining crops upward for airflow, and inspect leaves daily. Fine mesh can deter insects, while animal-barrier beds help protect plants from rabbits and deer.
Success in raised bed gardening for beginners often depends on being ready for what comes next. As your garden grows, tall plants and pests will become your main focus. Setting up your supports and guards before you plant is the best way to avoid stress later. Early setup saves you from the hard task of fixing a messy or sick garden in the heat of summer.
Use vertical space for growth
Plants like peas, beans, and melons love to climb. You can use trellising to help use tall space and support vining plants in your raised beds. This keeps your fruit clean and away from soil bugs. It also makes picking easier since you won't have to bend over as much to find your crops.
Growing up instead of out is a smart move for small gardens. It lets you fit more plants into a tight area without crowding them. If you plan your raised bed layout with tall growth in mind, you can place high items on the north side. This keeps them from shading small plants that need full sun to thrive. Many kits offer easy snap-on parts for trellises that need no extra tools.
Vining crops also get better air flow when they grow on a trellis. This helps to dry out the leaves after a rain and can stop rot or mold from starting. When plants are bunched on the ground, they stay damp for a long time. Lifting them into the air keeps the whole garden healthy and makes it easier to spot new growth or pests.
Protect crops with sturdy guards
Bugs and animals are a common trial for every gardener. Sturdy guards are often the most helpful way to keep your plants safe. Because they have clear edges, raised beds are easy to cover with insect screening fabric to improve pest control. These fine nets stop moths and beetles from reaching your crops while still letting rain pass through.
Large pests like deer or rabbits need a strong fix. If your yard has many animal guests, look into animal barrier garden beds. These systems use strong mesh walls to create a safe zone for your greens. A good guard stops animals from eating your hard work without the need for harsh sprays or messy powders.
Check for early warning signs
No wall is perfect, so you must still check your plants often. Make it a habit to walk through your garden every morning. Catching a problem early makes it much simpler to fix with a quick blast of water. Watch for these common signs of trouble:
- Small holes or chewed edges on leaves
- Sticky residue or tiny eggs on the bottom of plants
- Yellow spots or wilted stems that look weak
If you see something odd, act fast to remove the bad part of the plant. Daily care keeps your garden strong and ensures your raised bed gardening for beginners project ends with a big harvest.
Protect your harvest with a Frame It All animal barrier garden bed.
How do you keep a first raised bed productive all season?
Raised bed gardening for beginners is about more than just the start. Once your seeds sprout, you must keep them happy through the heat of summer and into the fall. A simple plan will help you get the most food from your space. Small tasks done once a week will prevent big problems later. This keeps your garden healthy and makes the work feel light.
Stick to a simple weekly routine
Water is the most vital part of a summer garden. Because the soil sits above the ground, it can dry out quickly in the sun. You should check the water levels at least two times per week. A moisture test of the top two inches of soil will tell you when to water. If that top layer feels dry, give your plants a deep soak at the base.
Weeds can still find their way into a raised bed. But since you never walk on the growing area, the soil stays loose and soft. This makes it very easy to pull weeds by hand. Spend ten minutes each week looking for tiny sprouts. Removing them early stops them from taking food away from your crops. This simple step keeps your plants strong and your bed looking neat.
Boost soil and harvest often
Picking your crops is a big part of garden care. Many plants will stop growing if they hold on to ripe fruit for too long. If you harvest beans, peas, and leafy greens often, the plant will keep making more. This is one of the best ways to get a big yield from a small space. Keep a simple log of what you pick to track your work for next year.
Your soil levels may drop as the season goes on. This happens as the plants use up the food and the dirt settles. You can add a thin layer of fresh compost to the surface. This soil and plant choice for raised beds helps feed the roots during the peak of summer. It also helps the dirt hold more water when the weather is hot and dry.
Clean up and expand your space
As the growing season ends, you need to clear the bed. Pull out any dead vines or stems once the frost hits. This prevents bugs and rot from hiding in your garden over the winter. Leaving the soil bare can lead to loss of food for future plants. You might want to cover the surface with a layer of mulch or leaves to protect it until spring.
Your first year is the best time to learn what works for you. You may find that you need more room for your best crops. The modular design of Frame It All beds makes it easy to grow your garden as your skills grow. You can use the choose the perfect raised garden bed guide to pick new parts. Adding more boards to your current bed is a quick way to double your harvest next year.
Frequently Asked Questions
What is the best material for building a raised garden bed?
You can build a raised bed using wood, metal, brick, or plastic boards. Cedar is a good choice because it does not rot fast. New boards made from old plastic and wood last a long time and have no splinters. According to the University of Minnesota, you should not use wood that has been treated with chemicals. Pick items that fit your budget while keeping your plants safe and healthy.
Are raised beds better than in-ground gardens for beginners?
Raised beds offer many wins for new growers. They drain water well and let you pick the best soil for your plants. This is helpful if your yard has hard or poor soil. These beds also stay warmer in the spring, which helps you start your garden early. Since the soil is high up, you will deal with fewer weeds and less back pain. These perks make it very simple to grow food with less hard work.
How often should I water a raised garden bed?
You should check your soil moisture each day during the hot summer. Raised beds act like large pots, so the soil dries out faster than the ground. This is very true for tall beds. A simple way to check is to push your finger two inches deep into the soil. According to the University of Minnesota, if the soil is dry at that depth, it is time to water. Adding a layer of mulch can help the soil hold water.
Can I use a raised garden bed in a shady yard?
Yes, you can still garden in a spot that does not get full sun. While crops like tomatoes need six to eight hours of light, many leafy greens grow well in shade. If your yard only gets a few hours of sun, choose plants like lettuce, kale, and radishes. These crops stay soft and sweet in cool, shady spots. Just make sure your bed is not under a big tree where roots might steal water from your plants.
What are common mistakes beginners make in raised bed gardening?
One common error is making the bed too wide. If you cannot reach the center, you may have to step on the soil. This packs the dirt down and makes it hard for roots to grow. Another slip is picking a spot with too much shade for sun-loving plants. You should also avoid using old dirt from your yard that may have weeds or pests. Start small so you can keep up with watering and care during your first year.
Are you ready to build your very first raised garden bed today?
Each day you wait is lost growth for your plants and skipping this season means missing the joy of picking your own very fresh food. Poor soil in the ground can stall your work and lead to weak crops that will not thrive if you do not act right now. Our kits make it easy to start today without the need for complex tools or heavy lifting so you can give your seeds a home.
Ready to build your first raised garden bed? Contact our team of experts today to build your first raised garden bed and start your path to a healthy and lush home garden now.