If you have limited space in your backyard but still want to enjoy the benefits of gardening, then raised garden beds along fences might be the perfect solution for you. Not only do these garden beds maximize the use of vertical space, but they also provide a unique and aesthetically pleasing way to grow your own plants, herbs, and vegetables.
In this blog post, we will explore the basics of raised garden beds along fences and provide you with some creative ideas to help you design your own. We will discuss the benefits of raised garden beds, how to plan and position them along your fence and discussion your raised garden bed options.
So whether you're a seasoned gardener looking for new ideas or a beginner wanting to start your gardening journey, this blog post will provide you with the inspiration and guidance you need to create a beautiful and functional raised garden bed along your fence. Let's dive in and explore the world of raised garden beds along fences!
Understanding the Basics: Benefits of Raised Garden Beds Along Fences

Raised garden beds along fences offer numerous advantages that make them a popular choice for both experienced gardeners and beginners. Here are some key benefits to consider:
- Optimal Use of Space: By utilizing the vertical space along your fence, you can maximize the available gardening area in your backyard. This is particularly beneficial if you have limited space or a small yard.
- Improved Drainage: Raised garden beds allow for better drainage compared to traditional in-ground gardens. The elevated design prevents water from pooling and helps prevent waterlogged soil, which can lead to root rot and other plant diseases.
- Better Soil Quality: With raised garden beds, you have full control over the soil composition. You can create a nutrient-rich and well-draining soil mixture that promotes healthy plant growth. This is especially advantageous if your existing soil quality is poor or contaminated.
- Reduced Weed Growth: Raised garden beds act as a barrier against invasive weeds. By elevating your plants, you can minimize the chances of weeds taking root and competing with your desired plants for nutrients and sunlight.
- Easy Access and Maintenance: The raised height of the bed makes it easier to reach and tend to your plants, reducing strain on your back and knees. Additionally, the defined boundaries of the bed make it easier to maintain and keep your garden organized.
- Protection from Pests: The elevated design of raised garden beds can offer some protection against common garden pests, such as rabbits or ground-dwelling insects. You can also install additional measures like wire mesh or fencing to further deter pests.
- Enhanced Aesthetics: Raised garden beds along fences can add a visually appealing and structured element to your garden. They can serve as a focal point or create a beautiful backdrop for other garden features.
- Extended Growing Season: Raised garden beds can warm up faster in the spring, allowing you to start planting earlier. Additionally, you can extend the growing season in the fall by using covers or cold frames to protect your plants from frost.
By understanding these benefits, you can see why raised garden beds along fences are an attractive option for gardeners of all levels. Now let's move on to the next section to explore how to plan and position your raised garden bed along a fence.
Planning and Positioning Your Raised Garden Bed Planter
Planning and positioning your raised garden bed along a fence requires careful consideration to ensure optimal sunlight exposure, accessibility, and overall aesthetics. In this section, we will guide you through the essential steps to help you plan and position your raised garden bed effectively.
Assessing Your Lawn and Fence Condition
Before starting your project, take a close look at your available space and assess the condition of your fence. Consider the following factors:
- Available Space: Measure the length and width of the area along the fence where you intend to build your raised garden bed. Take note of any obstacles like trees, shrubs, or utilities that may limit the available space.
- Fence Condition: Inspect your fence for any signs of damage or decay. Ensure that it is sturdy enough to support the weight of the raised garden bed. If necessary, repair or reinforce the fence before proceeding.
Choosing the Right Position for Sunlight
Proper sunlight exposure is crucial for the health and productivity of your plants. Consider the following tips when choosing the position for your raised garden bed:
- Sunlight Requirements: Determine the sunlight requirements of the plants you intend to grow. Most vegetables and herbs require at least 6-8 hours of direct sunlight per day. Take note of areas in your backyard that receive full or partial sunlight throughout the day.
- South-Facing Fence: If possible, position your raised garden bed along a south-facing fence. This will ensure that your plants receive the maximum amount of sunlight throughout the day.
- Shade Considerations: Be mindful of any nearby structures, trees, or tall plants that may cast shade over your garden bed. Avoid positioning your raised bed in areas that are heavily shaded, as this may inhibit plant growth.
Designing the Layout of the Garden Bed
Once you have assessed your space and determined the best position for your raised garden bed, it's time to design the layout. Consider the following factors:
- Bed Dimensions: Decide on the dimensions of your raised garden bed, taking into account the available space and your gardening needs. Ensure that the width allows for easy reach to the center of the bed from both sides.
- Shape and Style: Choose the shape and style of your raised garden bed. Common options include rectangular, square, or even curved beds. Consider the overall aesthetics of your garden and select a design that complements the existing landscape.
- Accessibility: Plan for easy access to your raised garden bed. Leave enough space around the bed for you to comfortably move and tend to your plants. Consider pathways or stepping stones that allow you to navigate through your garden without stepping on the soil.
By carefully planning and positioning your raised garden bed along your fence, you can optimize sunlight exposure, ensure accessibility, and create a visually pleasing garden space. In the next section, we will dive into the materials needed and the step-by-step process of building your raised garden bed.
Building Your Raised Garden Bed Along a Fence
Building a raised garden bed along a fence is a rewarding and relatively straightforward project that can be completed with the right materials and tools. In this section, we will guide you through the process of building your own raised garden bed step-by-step.
Creating a Flourishing Haven: DIY Raised Garden Bed Ideas Along Fences
Are you ready to transform that neglected strip of lawn along your fence into a vibrant and productive space? With these easy DIY raised garden bed ideas, you can elevate your gardening game while maximizing limited space. From vegetable gardens to herb sanctuaries, here's a guide to help you build the perfect raised garden bed along your fence.
1. Classic Wooden Raised Beds: Proven and Timeless
One of the easiest ways to create a raised bed garden is by using wood. Choose untreated, rot-resistant lumber to ensure the longevity of your garden beds. Mitered corners add a professional touch and make assembly a breeze. This method is perfect for the traditional gardener who appreciates the classic look and natural feel of wood. If you have leftover fencing material, repurpose it to create a cohesive look along the perimeter.
2. Cinder Blocks and Concrete: Sturdy and Stylish
For a more industrial and modern aesthetic, consider using cinder blocks or concrete blocks. Stack them easily, and they provide excellent durability. The best part? No need for screws or additional hardware. Create a built-in look by incorporating concrete blocks as both the structure and the planter itself. This is not only a visually appealing option but also a low-maintenance one.
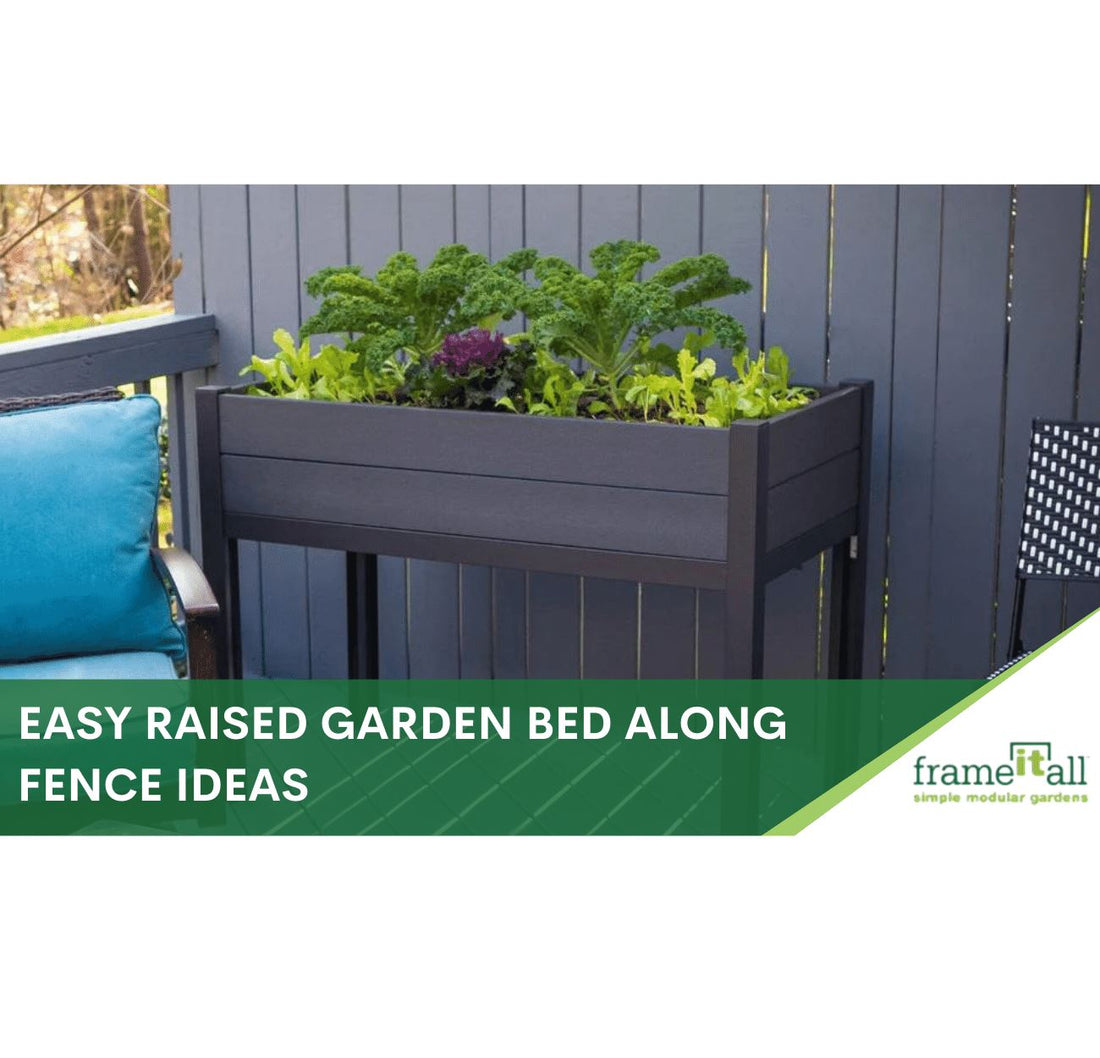
3. Composite Garden Beds: The Eco-Friendly Choice
If you're looking for an eco-friendly alternative, composite garden beds are the answer. Constructed from a mix of recycled wood fibers and plastic, these beds are durable, resistant to rot, and low-maintenance. The best part? You won't need to worry about the long-term effects of weather exposure on your garden beds and they are easy to attach to one another. Plus, they provide a cohesive look and are available in various sizes such as 2×4 or larger.

4. Galvanized Metal Containers: Sleek and Modern
Galvanized metal containers offer a sleek and modern aesthetic for your raised garden beds. The zinc coating protects against corrosion, making them a durable choice. These metal planters not only look great but also provide a unique and trendy way to enclose your garden. Consider arranging them along the fence, creating a stylish perimeter for your vegetable or herb haven.
5. Repurposed Pallets: Budget-Friendly and Creative
For the resourceful gardener, repurposing pallets is an easy and budget-friendly way to create raised garden beds. Disassemble the pallets, and use the planks to build the sides of your garden beds. The open slats allow for proper drainage, and the gaps between the planks give the beds a rustic charm. It's a creative way to extend the life of discarded materials while adding character to your garden.
6. Lawn Edging and PVC Trellis: Utilizing Vertical Space
In limited spaces, going vertical is a smart move. Use PVC pipes to create trellises along the fence, providing support for climbing plants like peas or decorative vines. Integrate lawn edging to delineate the garden beds and keep a cohesive look. This solution not only maximizes space but also adds a touch of elegance to your garden.
Choosing and Planting Your Plants - Is a DIY raised garden bed for you?
Choosing the right plants for your raised garden bed along a fence is essential to ensure successful growth and a bountiful harvest. In this section, we will discuss how to select suitable plants for your garden bed, understand plant spacing and sunlight needs, and provide guidelines for planting and care.
Selecting Suitable Plants for Your Garden Bed
Consider the following factors when choosing plants for your raised garden bed:
- Sunlight Requirements: Determine the amount of sunlight your garden bed receives throughout the day. Some plants thrive in full sun, while others prefer partial shade. Match the sunlight requirements of your chosen plants with the available light in your garden bed.
- Plant Size and Spacing: Consider the mature size of the plants and plan accordingly to avoid overcrowding. Leave enough space between each plant to allow for proper airflow and growth. Check the recommended spacing guidelines for each plant variety.
- Companion Planting: Practice companion planting by selecting plants that benefit each other when grown together. For example, planting marigolds alongside vegetables can help repel pests.
- Crop Rotation: Plan for crop rotation by choosing a variety of plants with different nutrient requirements. This helps prevent soil depletion and the buildup of pests or diseases.
Understanding Plant Spacing and Sunlight Needs
Proper plant spacing and understanding sunlight needs are crucial for maximizing productivity and preventing issues such as overcrowding or shading. Consider the following tips:
- Spacing Guidelines: Follow the recommended spacing guidelines for each plant variety. This ensures that plants have enough room to grow and receive adequate nutrients and sunlight.
- Trellising and Supports: Some plants, such as tomatoes or cucumbers, may require trellises or supports. Plan for these structures in your garden bed to provide vertical growing space and support for your plants.
- Sunlight Considerations: Arrange your plants in the garden bed according to their sunlight needs. Place taller plants towards the back of the bed to prevent shading smaller plants. Consider the orientation of the fence and how it may cast shadows at different times of the day.
Planting and Care Instructions
Follow these general guidelines when planting and caring for your raised garden bed:
- Planting: Dig a hole slightly larger than the plant's root ball and gently place the plant in the hole. Backfill with soil, ensuring that the plant is at the same depth as it was in the container or nursery. Firmly press the soil around the plant to eliminate air pockets.
- Watering: Provide regular watering to keep the soil consistently moist but not waterlogged. Avoid overwatering or letting the soil dry out completely. Use mulch around plants to help retain moisture and reduce weed growth.
- Fertilizing: Apply organic or slow-release fertilizers according to the specific needs of your plants. Follow the instructions on the fertilizer packaging and avoid over-fertilization, as it can harm the plants.
- Weeding: Regularly inspect your garden bed for weeds and remove them promptly to prevent competition for nutrients and space.
- Support and Pruning: As your plants grow, provide support for vining or tall plants using stakes, trellises, or cages. Prune plants as needed to maintain their shape and encourage healthy growth.
By carefully selecting and planting your plants, and providing proper care throughout the growing season, you can enjoy a flourishing and productive raised garden bed along your fence. In the next section, we will explore maintenance tips and techniques to keep your garden bed in optimal condition.
Conclusion: Embrace the DIY Spirit for a Lush Garden
Whether you opt for the classic wooden charm, the modern appeal of galvanized metal, or the eco-conscious choice of composite materials, creating raised garden beds along your fence is a rewarding endeavor. Embrace the DIY spirit, reuse materials, and watch your garden thrive. It's time to assemble, plant, and enjoy the fruits (and vegetables) of your labor!